There’s something about the Ohio Star quilt block, with its clean lines and perfect balance, that feels both traditional and modern at the same time. While pondering my fabric stash last weekend, I felt like two solids were really calling my name, and next thing you know I was whipping up some Ohio Stars.
There are a lot of ways to use this block, depending on how you place your fabrics, but I love it most when it’s stripped down to just two colours. The geometric star really stands out in this version, creating a minimalist look that’s perfect if you want a quilt that looks both contemporary and timeless.
[image]
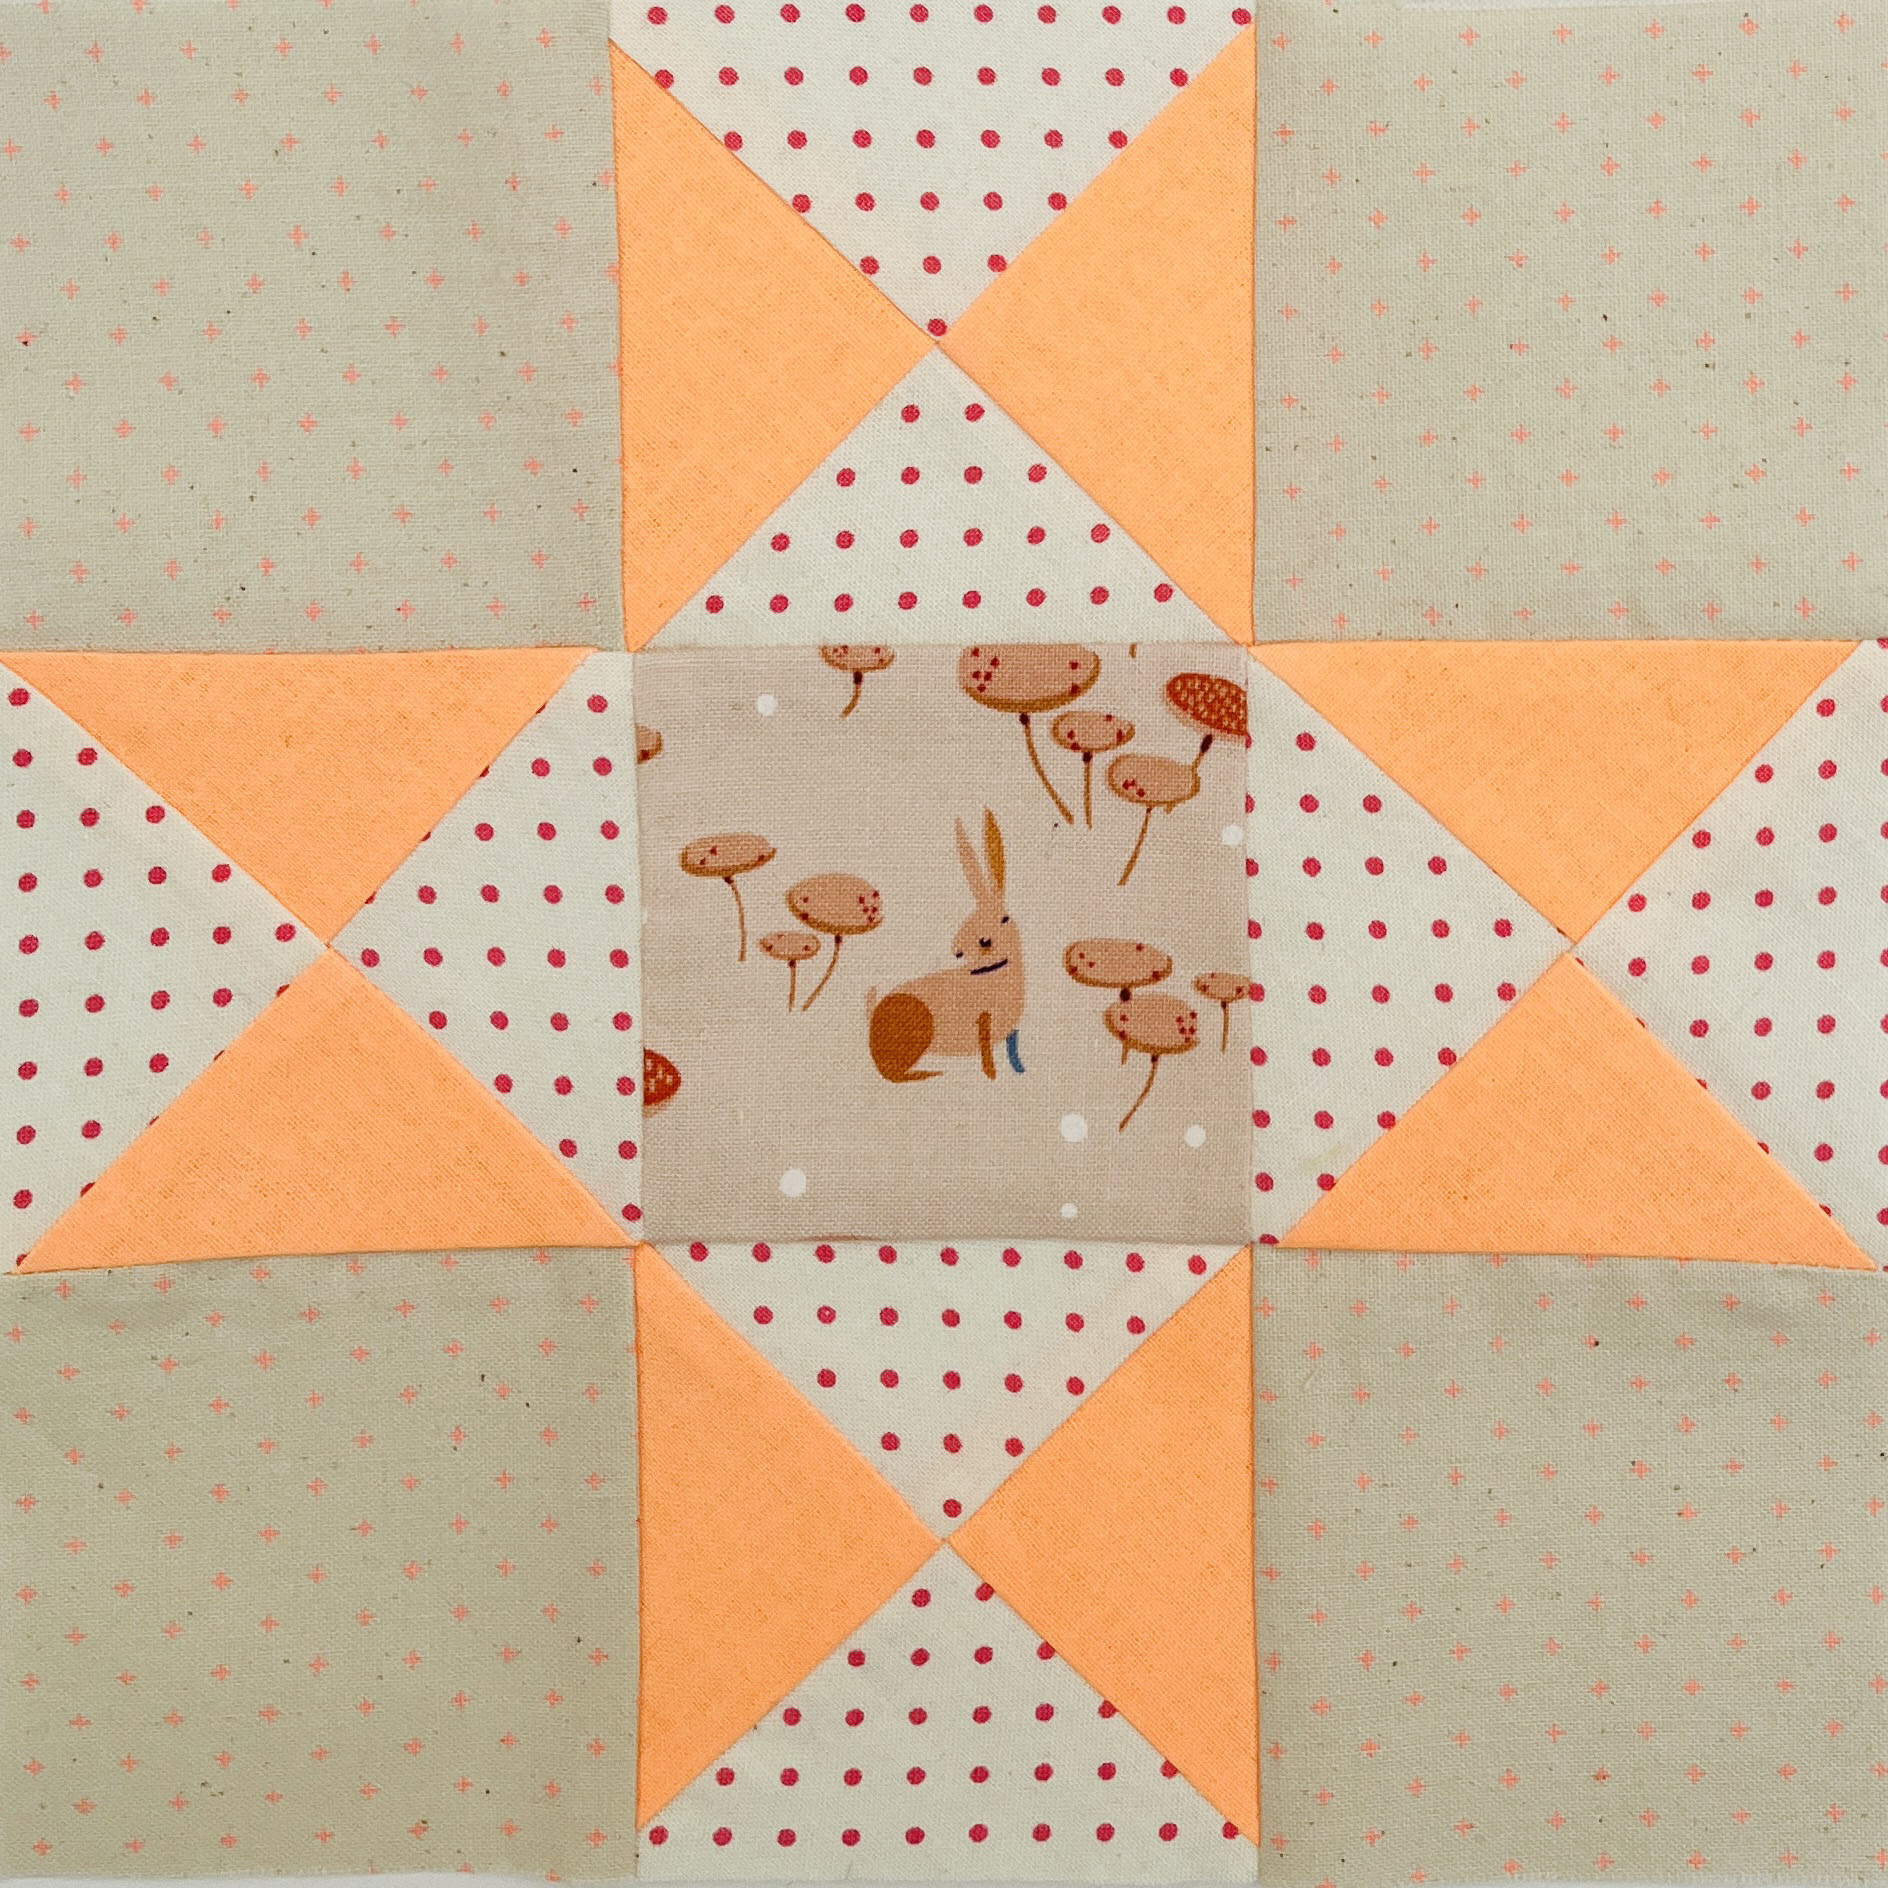
I also found a few orphan blocks that I created from scraps at some point. I thought I’d share the one above because it’s a good example of the variety you can get when you play around with fabric placement a bit, and use a feature print for the center. The block below uses:
- Add it Up in Birthday Hat from Cotton and Steel (for the corners)
- Riley Blake Swiss Dot and Michael Miller Neon orange (for the Quarter Square Triangles (or QSTs)
- A print by Lizzy House (for the centre) that I’m not quite sure the name of!
If you’ve never made an Ohio Star block before, don’t worry – it’s simpler than it looks. The quarter-square triangles might seem tricky at first, but once you make a few, you’ll get the hang of it. I’ve put together step-by-step instructions below for a 9″ block (9 1/2″ unfinished), along with a measurements chart for different block sizes.
Whether you’re making a single block for a sampler or planning an entire quilt, I hope this walkthrough brings you some Ohio Star joy!
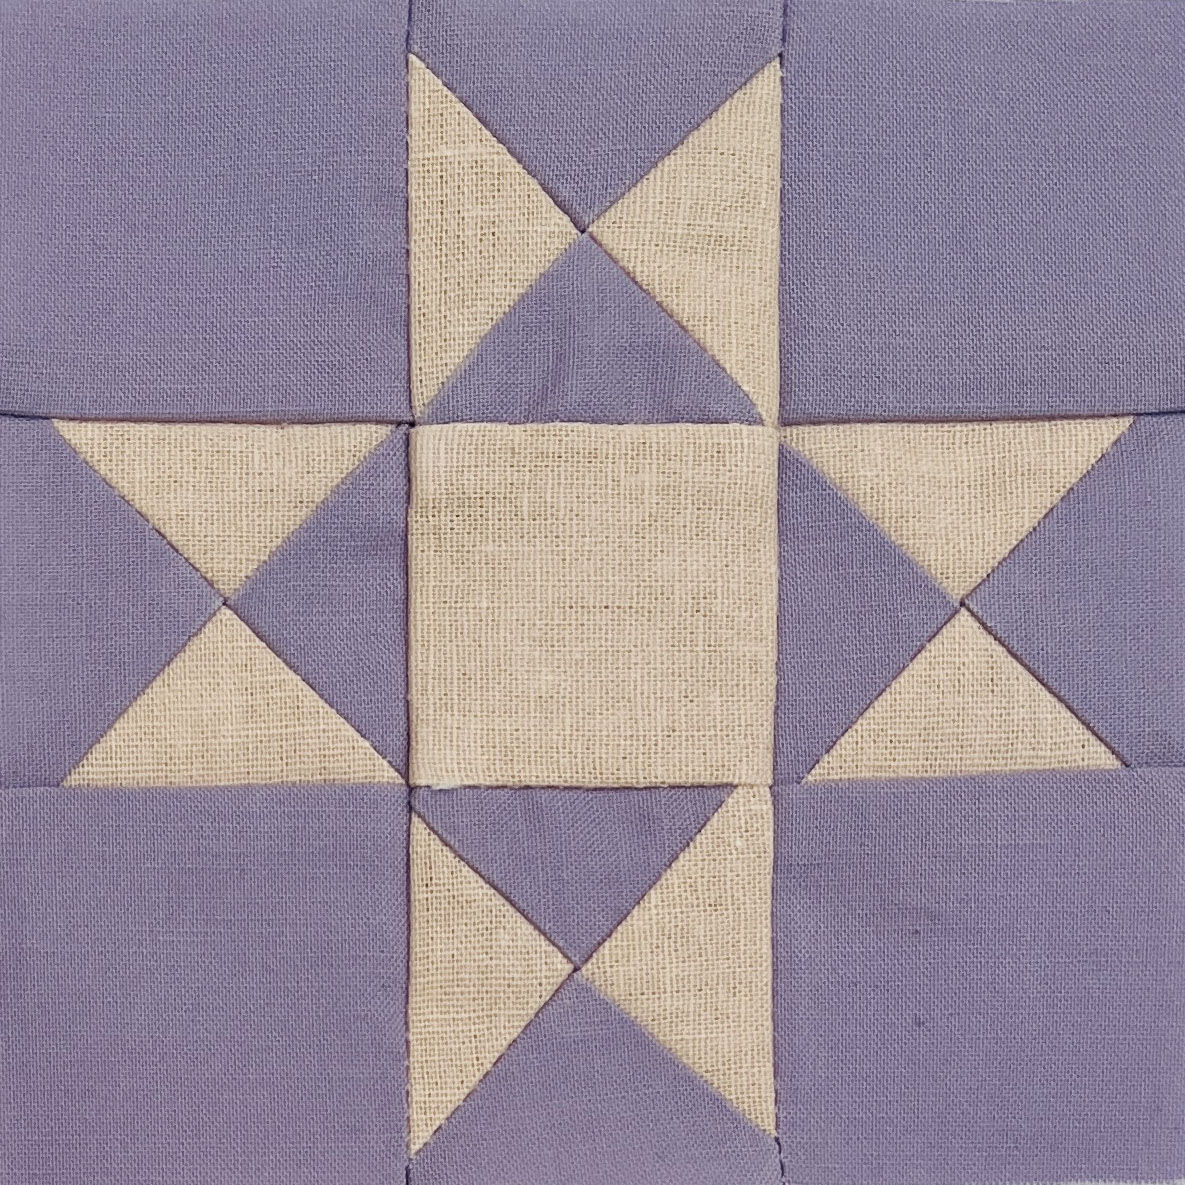
A teeny Ohio Star made from a Kona Cotton Solid (the purple) and Pale Pink Essex Linen
How to Make an Ohio Star Quilt Block (with Size Chart)
Here’s a step-by-step guide to making an Ohio Star Quilt Block:
Materials
- Background fabric (light color)
- Star fabric (darker color or feature print)
- Rotary cutter, mat, and ruler
- Sewing machine and thread
- Iron and pressing surface
Cutting Instructions
- From background fabric, cut:
- Four 3½” squares
- Two 4½” squares (for quarter-square triangles)
- From star fabric, cut:
- One 3½” square (center)
- Two 4½” squares (for quarter-square triangles)
Sewing Instructions
- Make Half Square Triangles (HSTs)
- Place one background 4½” square and one star fabric 4½” square right sides together
- Draw a diagonal line on the wrong side of the lighter fabric
- Sew ¼” away from both sides of the drawn line
- Cut along the drawn line to create two half-square triangles (HSTs)
- Press seams toward the darker fabric
- Repeat with the remaining 4½” squares
- You now have four HSTs
- Create Quarter Square Triangles (QSTs) from HSTs
- Take two HSTs and place them right sides together with opposite fabrics resting on top of one another (the seams should nest)
- Draw a diagonal line perpendicular to the seam line
- Sew ¼” away from both sides of the drawn line
- Cut along the drawn line
- Press seams open or to one side
- Repeat with the remaining two HSTs
- Trim all four QSTs to 3½” square
- Arrange your blocks
- Lay out your pieces in 3 rows of 3 squares each:
- Row 1: QST, background square, QST
- Row 2: Background square, star center square, background square
- Row 3: QST, background square, QST
- Make sure the QSTs are rotated correctly to form the star points
- Lay out your pieces in 3 rows of 3 squares each:
- Sew the rows together:
- Sew the squares in each row together with ¼” seam allowance
- Press seams in alternating directions by row (first row to the right, second row to the left, third row to the right)
- Complete the block:
- Sew the three rows together with ¼” seam allowance
- Press seams
- Your Ohio Star block should measure 9½” unfinished (9″ finished when sewn into a quilt)
Ohio Star Quilt Block Cutting Guide
This table shows the cutting measurements needed for Ohio Star blocks in various finished sizes. The measurements account for standard ¼” seam allowances, with the unfinished block size being ½” larger than the finished size.
- For QSTs: cut 2 squares each from background fabric and star fabric at the listed size. You’ll use these to make the star points
- Center Square: cut 1 from star fabric (or feature fabric)
- Corner Squares: cut 4 from background fabric
| Finished Block Size | Unfinished Block Size | Center Square | Corner Squares (4) | Squares for QSTs (4)* |
|---|---|---|---|---|
| 3″ | 3½” | 1½” | 1½” | 2½” |
| 4″ | 4½” | 2″ | 2″ | 3″ |
| 6″ | 6½” | 2½” | 2½” | 3½” |
| 8″ | 8½” | 3″ | 3″ | 4″ |
| 9″ | 9½” | 3½” | 3½” | 4½” |
| 10″ | 10½” | 4″ | 4″ | 5″ |
| 12″ | 12½” | 4½” | 4½” | 5½” |
Fabric Requirements
For each block you’ll need:
- Background fabric: 4 corner squares plus 2 squares for QSTs
- Star fabric: 1 center square plus 2 squares for QSTs
General Formula
To make a custom-sized Ohio Star block:
- Finished Block Size = your desired size
- Unfinished Block Size = Finished Block Size + ½”
- Center & Corner Squares = (Finished Block Size ÷ 3)
- Squares for QSTs = (Finished Block Size ÷ 3) + 1″