Hello! Something different to share with you this week … a progress tracker for your quilts! If you happened to read last week’s letter, you know that the Ruby Star Summer Sew Along turned out to be a pretty good stash buster project for me. And now I’m super motivated to keep that momentum going. My next step is to start tackling my pile of work in progress (WIP) quilts. To be honest I don’t even know how many projects I have on the go at this point. But I know it will feel so good to start wrapping some of them up and – ideally – getting some finished quilts out the door to friends and family.
First order of business was to make a list and figure out which projects I could finish most quickly … the low hanging fruit if you will. I’ve tried paper worksheets and planners of all kinds in the past but have never been able to stick with them for some reason. Then I was thinking: at my job I use a tool called Notion to organize practically everything I do, why not try it for all my quilt projects?
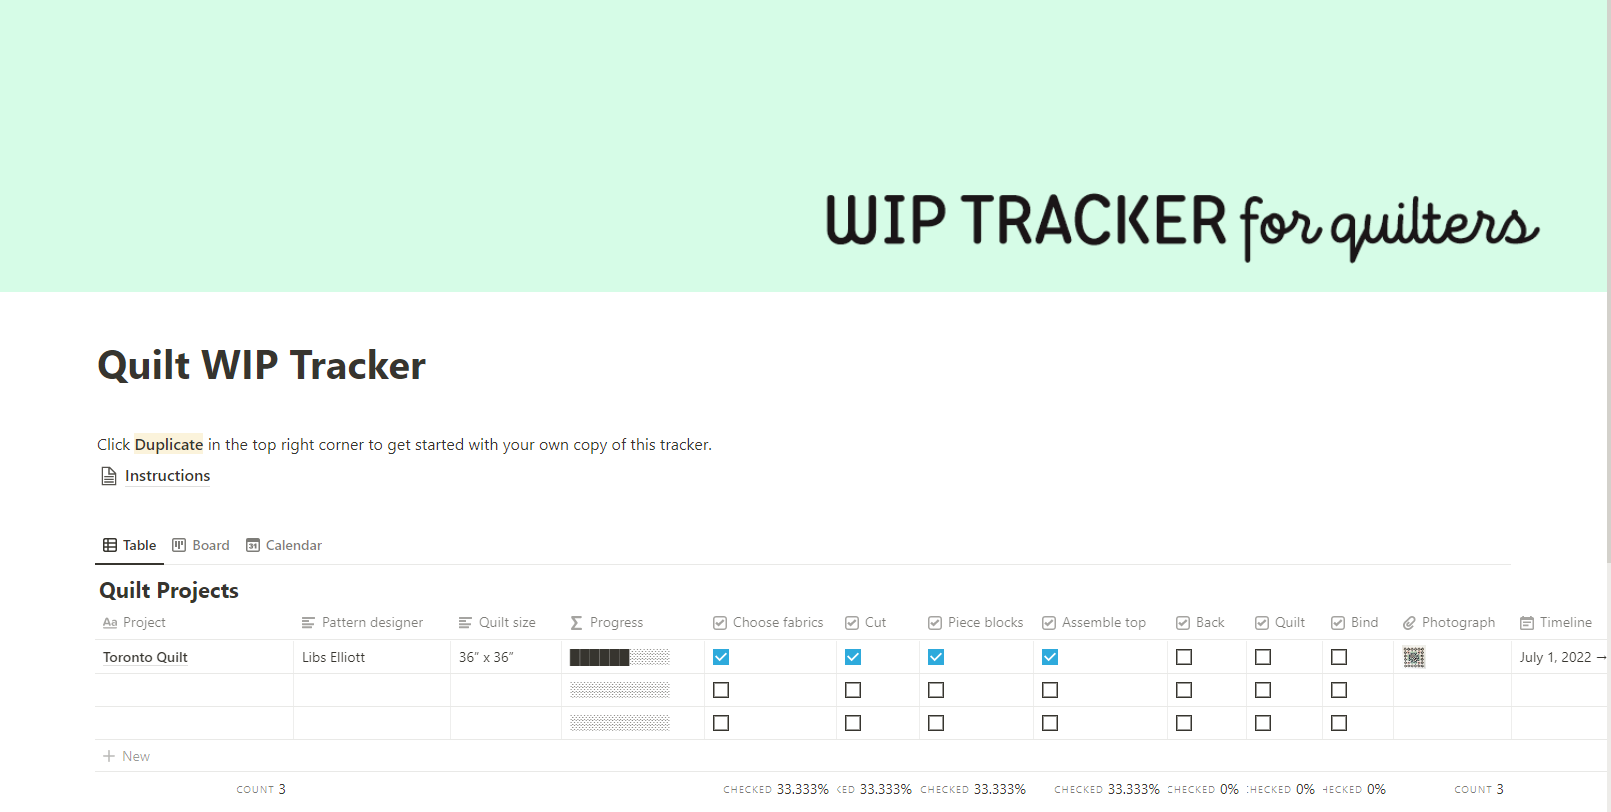
So I spent some time and designed a planner with just enough functionality to quickly show all my WIPs and their state of completion at a glance, but not so many features and options that keeping it updated becomes a chore. The image above is what it looks like blank, and below is a snapshot of what it looked like once I started filling it out.
As you check off tasks for each project, the progress bars start filling up. And if you add a photo in the Photograph column, it will automatically appear in a little gallery at the bottom of the page.
How do you track your projects? Do you use paper or some kind of app? One thing I like about this WIP tracker is that I can use it either on my desktop computer or on my phone. You can actually try it out yourself for free – I’ve posted the template for anyone to use, and all you need is a free Notion account. Just be sure to type “0” (zero) in the “Name a fair price” field before you click the button, and you’ll instantly receive a link. Click the link, then click Duplicate in the top right corner (or Try Notion first, if you don’t have an account yet, then Duplicate). The template will be copied to your own Notion workspace, ready for you to start using.
If you try it out, let me know what you think in the comments!