This spring I wanted springy tote for the library and trips to the grocery store, and I thought what better option than a quick little bag using a new collection from Ruby Star Society that is all about fun color and moving forward.

Materials
For my tote’s exterior I used fabrics from the Pivot collection by Ruby Start Society’s Rashida Coleman Hale.
- one 1/2 yard of Mobility in Natural for the main bag body and handle
- one fat eighth Beaded in Soft Black for the bag bottom (use this for the pupil as well)
- for the Little Bird block, one fat eighth each:
– Double Dots in Yellow
– Wild Flower in Playful
– Burners in Dark Turquoise
You will also need:
- quilt batting
- medium weight fusible interfacing, two strips 22” long x 1 1/4” wide
- two fat quarters for the back of the panels
- one 1/2 yard lining fabric
Before you begin
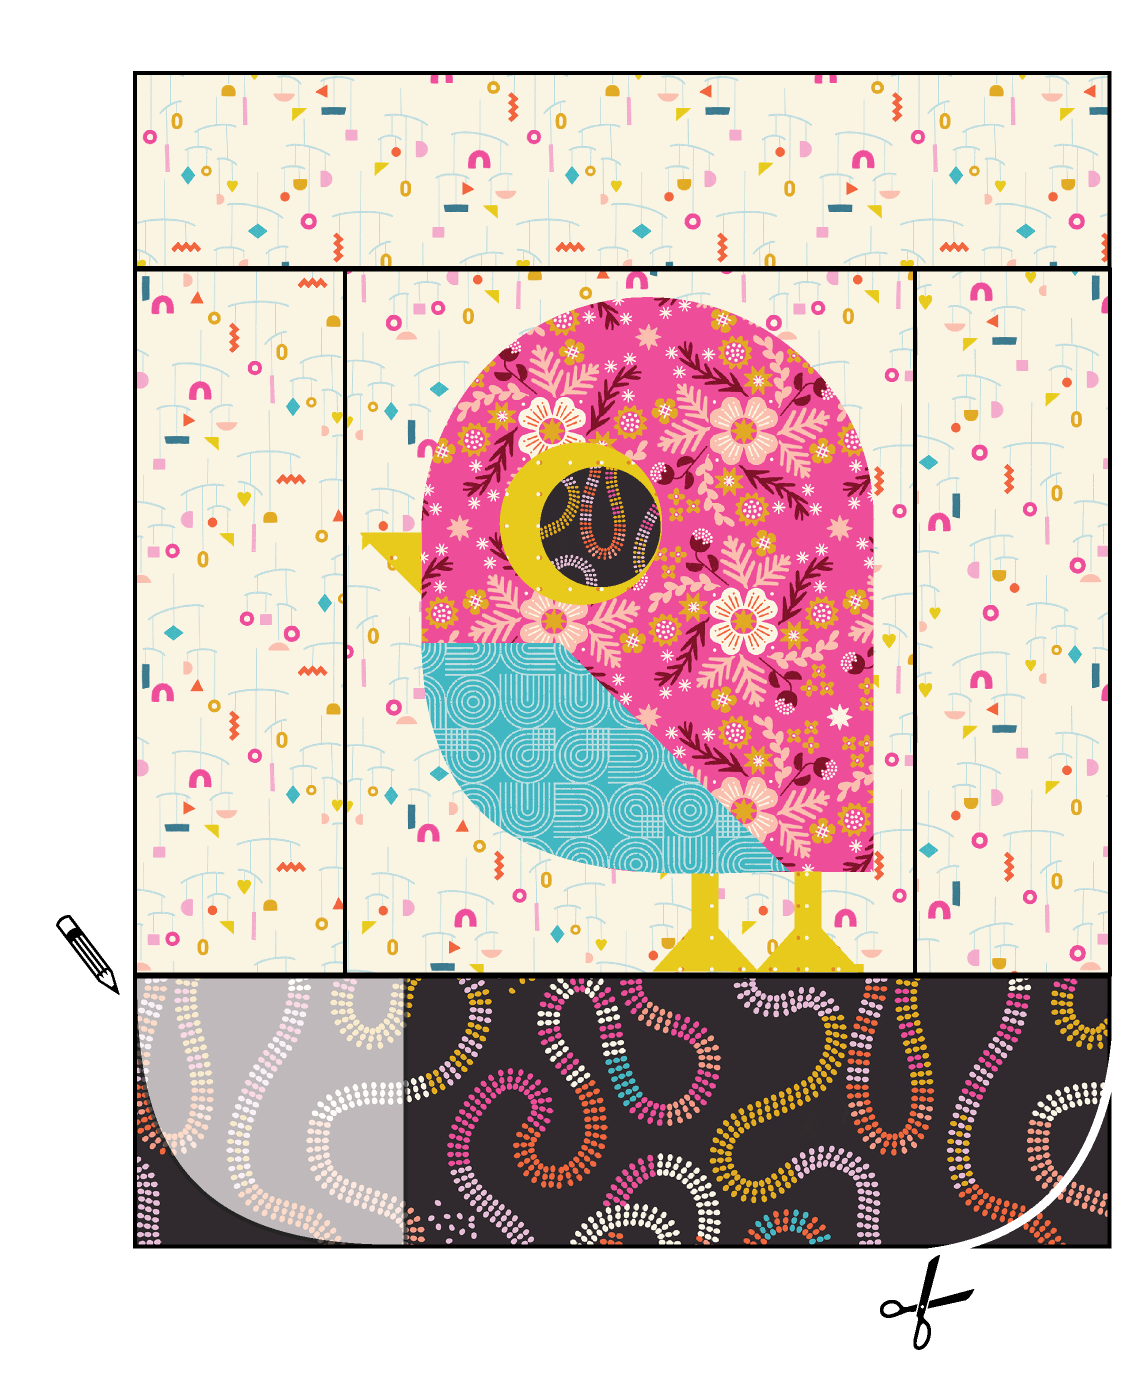
Sew a single Little Bird block. The Little Bird block is 9 1/2″ x 11 3/4″ in size. If you don’t have the pattern, you can use any block of a similar size and sew borders around it big enough to arrive at the overall dimensions of at least 16″ wide x 18 1/4″ tall (before quilting).
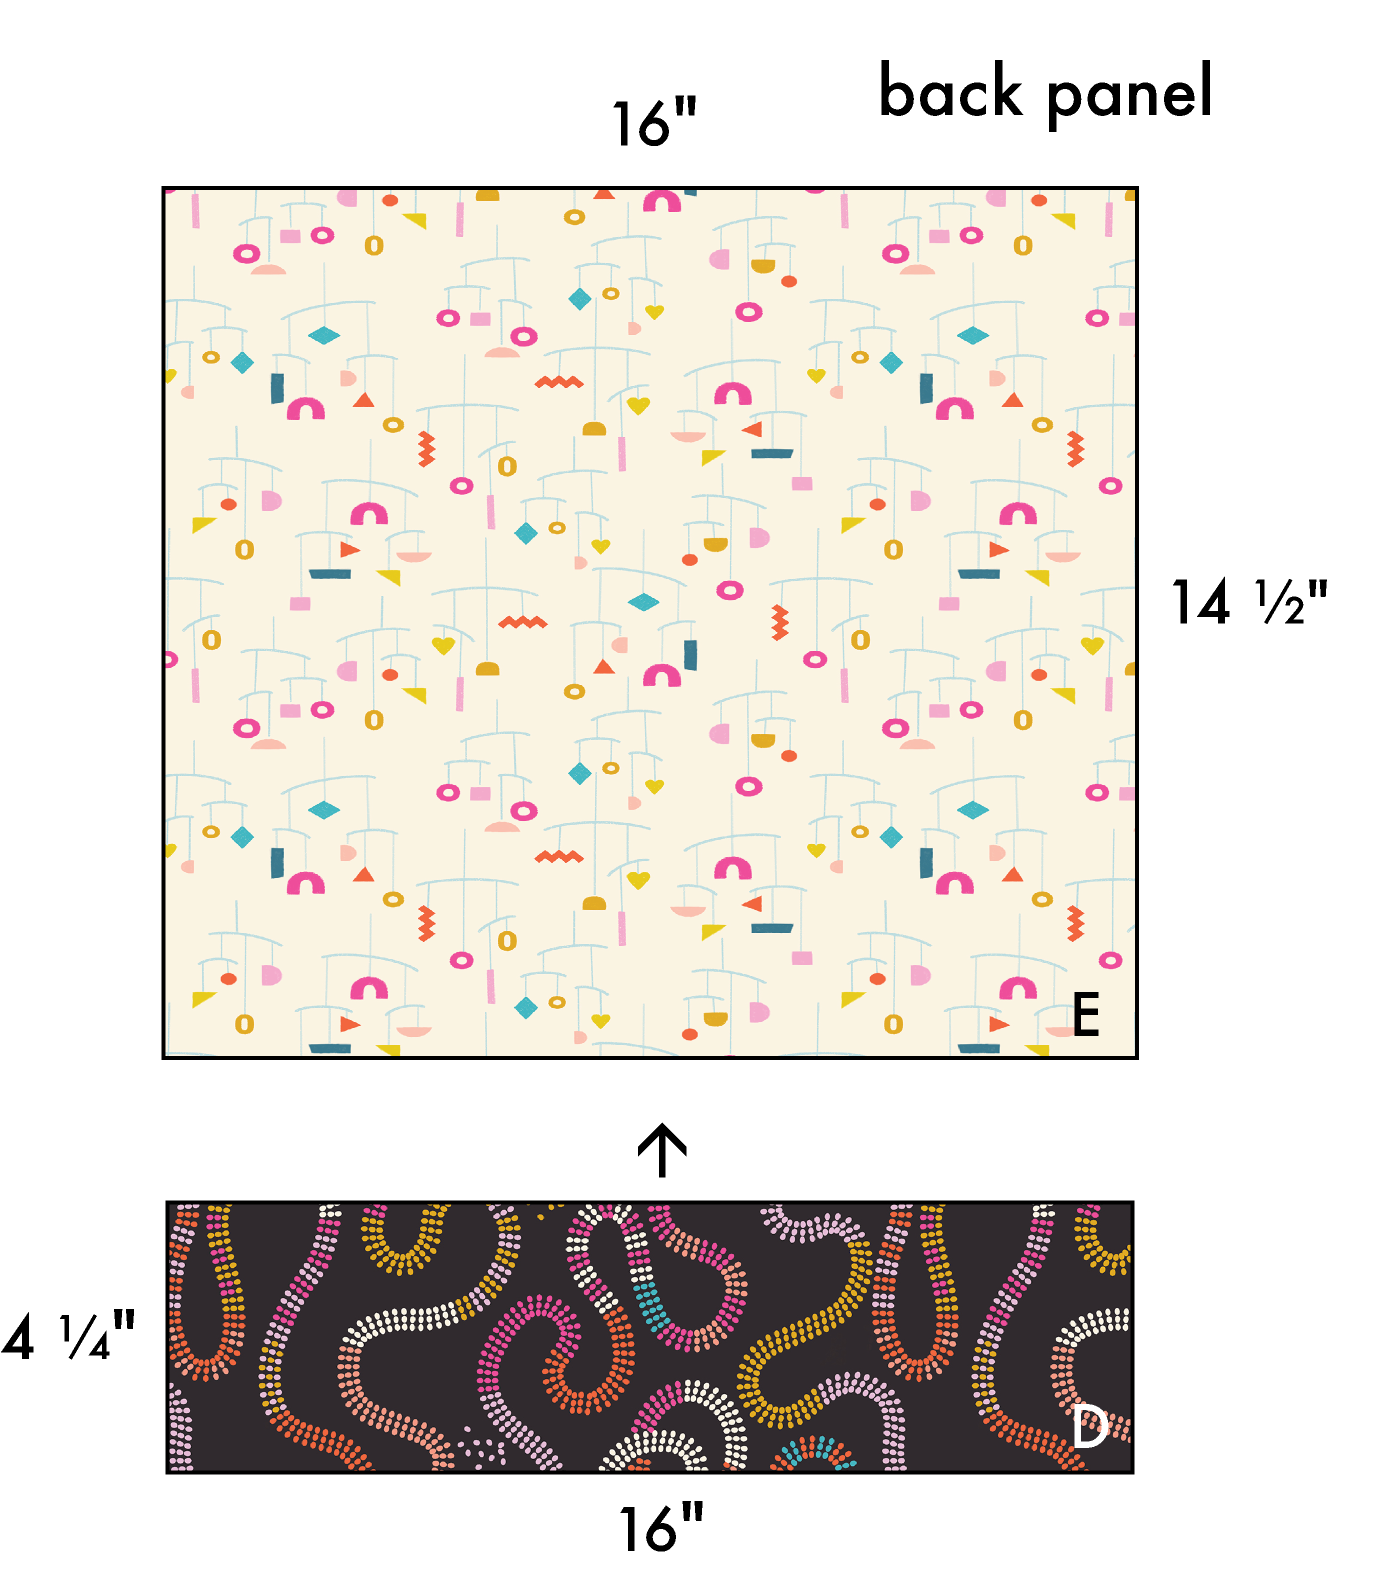
Cut the following pieces from your fabric. A through D (1) will become the borders for the Little Bird block, which will become the front panel. If you aren’t using Little Bird as your feature block, adjust the borders up or down accordingly (in the end you’re going for a panel that will be trimmed to 14 1/4″ wide by 18″ high after quilting).
-
- A from bag body fabric: 3 1/2″ x 11 3/4″
- B from bag body fabric: 3 1/4″ x 11 3/4″
- C from bag body fabric: 3 1/4″ x 16″
- D (cut 2), from bag bottom fabric: 4 1/4″ x 16″
- E from bag body fabric: 16″ wide by 14 1/2″ tall
- F (cut two) from bag body fabric: 3 1/2″ x 22″ long
- G (cut two) from lining fabric: 14 1/4″ wide by 19 1/4″ tall
Sew the tote
- Using a 1/4″ seam allowance, sew piece A to the left side of the Little Bird block, and B to the right side.

- Using a 1/4″ seam allowance, sew piece C to the top of the Little Bird block, and D to the bottom.

- For the back panel, sew piece D to piece E along the 16″ side.
- Make two quilt sandwiches using two fat quarters, batting cut to size, and the front and back panels. Make sure the fabrics are right sides out, with wrong sides facing the batting.
- Quilt each panel, then trim to 14 1/4″ wide by 18″ tall.
- Use the convex curve templates from the Little Bird Pattern to trace a rounded line at each bottom corner of both panels. If you don’t have the little bird pattern, use a plate or a container that is about 4″ in diameter.
- Cut along the curve, and with right sides facing, sew the panels together around the sides and bottom with a 3/8″ seam, leaving the top open.
- Sew the lining.
- Press the top edge of each lining piece 1/2″ to the wrong side of the fabric.
- Press the bottom edge of each lining piece 1/4″ to the wrong side of the fabric.
- Create curved bottom corners on the short bottom edge of each lining piece, the same way you did with the quilted panels.
- Place the lining pieces right sides together. When pinning together, place two pins about 10 inches apart along the bottom edge.
- Sew 5/8″ from the edge around the sides and bottom of the lining, leaving a large gap open between the two pins.
- Sew the handles.
- Press both long edges of each F piece 1/4″ toward the wrong side of the fabric.
- Wrap each piece around a piece of interfacing, so that one of the pressed edges is close to one side.
- Press, and sew 1/8″ away from each long edge to secure. Add 2 – 3 additional lines of stitches between these if you like.
- Turn the exterior of the bag inside out and pin the ends of each handle to the open raw edge on each side, with inside edges 6 1/2″ apart. Sew a few lines a scant 1/4″ from the edge to secure.
- With the lining inside out, and the handles still looping downward inside the bag exterior, place the lining, place the lining inside the bag and pin along the top edges. The right sides of the bag exterior and lining should be facing one another.
- Sew along the pinned edge.
- Using the gap in the bottom of the lining, turn the entire bag right side out. Pin the folded edges together and sew along the edge to close the gap.
- Push the lining inside, and your bag is finished!
Pin:

Resources
Fabrics: Pivot by Rashida Coleman Hale from Ruby Star Society
Pattern: Little Bird baby quilt (use one block)
Quilting: Bernina 350 Patchwork Edition